We're creating a series of dolls house templates you can use to make your own DIY doll houses. You can use cardboard, plywood or any suitable board material with these printable templates. First up is this simple yet one of the coolest houses of all - the haunted house!
Halloween is coming up making it a perfect seasonal toy but a haunted house is such a great classic theme for all year round imaginative play. We have tips for making spooky peg dolls who live here and extra templates for a few accessories to decorate the house.
Are you ready to enter the haunted house? Be brave and take a tour of the house…

The peg ghost welcomes you at the door. She or he (we don’t know) is normally hovering near the door, peeking out to see if there’s anyone to boo.

The next room downstairs leads to the basement where the talking skull usually lives. Ratty hangs out here mostly too. There is a staircase going upstairs so let’s go up.

The black cat likes to stay near the window upstairs, looking out for new visitors. The ghost knows that you’re here now so it will try to boo you from behind every window and door it can manage.

In a room on the top floor there is a wardrobe. Peg skeleton sleeps there so don’t wake him up! He sometimes loses his head.
There are many rooms in this house – all 8 rooms! – so take your time and explore. You can see the ghost waiting behind the wall in the next room for you. Just pretend you are surprised and a little scared (so as not to disappoint).
How to make
the haunted dolls house
[shortcode]
1
Print the template and choose your material. We used plywood but brown cardboard or any thick card material will work perfectly too.
2
Cut your material according to the template but adjust the slot size depending on your material thickness. The default template slot size is for 5mm plywood.
3
Sand the edges smoothly if you’re using wood. Check if each slot fits well. There are 6 pieces in total.
4
Either paint it with non-toxic black acrylic, chalk board paint or stain with eco stain in jet black (like we did). This house template is good for many other basic doll houses too but we’ll use black here for the haunted house.
5
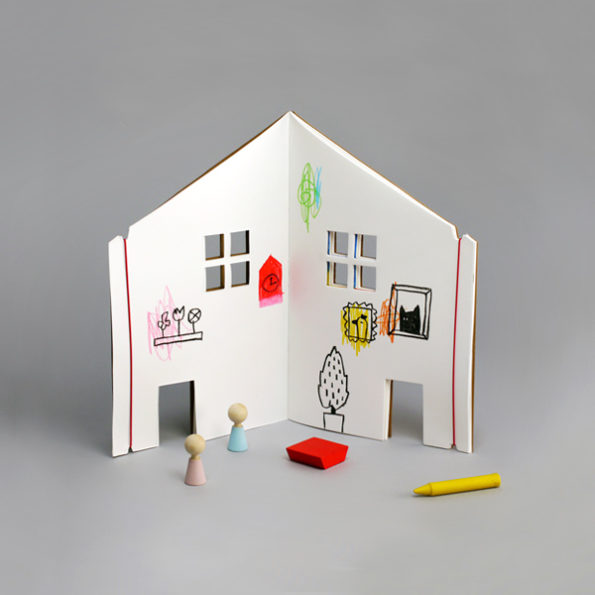
That’s it. Once you’ve cut your templates and sanded, everything should slot nicely together as in the photo above. No glueing is needed and you can take the pieces apart and pack it flat again. If you’d like to secure it more we suggest drilling small holes where the four walls meet – at the base and at the apex and tying with black thread.
Now you may want to create some residents of the haunted house!
How to make
the spooky peg dolls


Have a look at our original peg dolls tutorial here. We normally cut the ends off to make the dolls stand up.
Here are a few tips for the dolls we made this time:
– You can cut them very short to make little animals like the cat and the bat. Glue on small paper ears if you like.
– For the rat, cut it short and also cut off the ‘head’ of the peg and sand the end round and smooth. Glue a bit of yarn as a tail, we drilled a tiny hole for the thread.
– For the ghost, cut the legs to a length you like, cut off the head (this is normal in the haunted house). You can cut the base off at angle so it leans like a ‘real’ ghost.
– Now for the skull peg doll with detachable head. Cut off the head again and drill a small hole on both cut sides. Insert a small stick that fits the drill hole (we used a bbq skewer) in one of the holes and glue. You can take the head off and on now as much as you like. Make monsters or zombies who can lose or swap their heads too!
DOWNLOADS
Our free printables are strictly for personal use only.
By downloading you are agreeing to our Terms of Use .


Follow
Pom Maker

SHOP


SHOP